Custom Land Editor
The next phase of Project Superior Interiors is finally here! OK, that project is made up, but the new update is as real as can be.
We’re proud to unveil our latest and greatest feature: the Custom Land Editor. It’s no secret that the current array of “Land” — the umbrella term for terrain made of blocks, chamfers, and ramps — were designed for exterior spaces. Interior assets were a good first step, but for cohesive interior experiences, builders are going to need some more blocks. How can we ensure that you’ll find exactly what you need? The answer: give you intuitive tools to make them yourself.
Putting the tools in builders’ hands to create custom textures for blocks, chamfers, and ramps has been floating around in the suggestions box for quite a while — we figure now is the perfect time to make that dream a reality. The benefits for interior building are obvious, but the new land editor will benefit every kind of SuperCode architect. If you can't find the perfect block you need, just make it yourself!

Where can you find it? There’s a new type of entity in town and it's called the “Custom Land Entity." Now when you're browsing the Land category in the inventory, you’ll find all the beautiful blocks you’ve created. You’ll also see a “+” icon. Press that to open up the Custom Land Editor.
What you're seeing first is the editor's Texture Selection View.
This is where you can find all the textures, both stock and custom, you can apply to your new entity. It might look intimidating at first but once you get the ball rolling, it’s a breeze! So, how does it work? The texture selection view is divided into two halves: the right side is dedicated to selecting blocks and sides while the left deals with the block textures themselves.
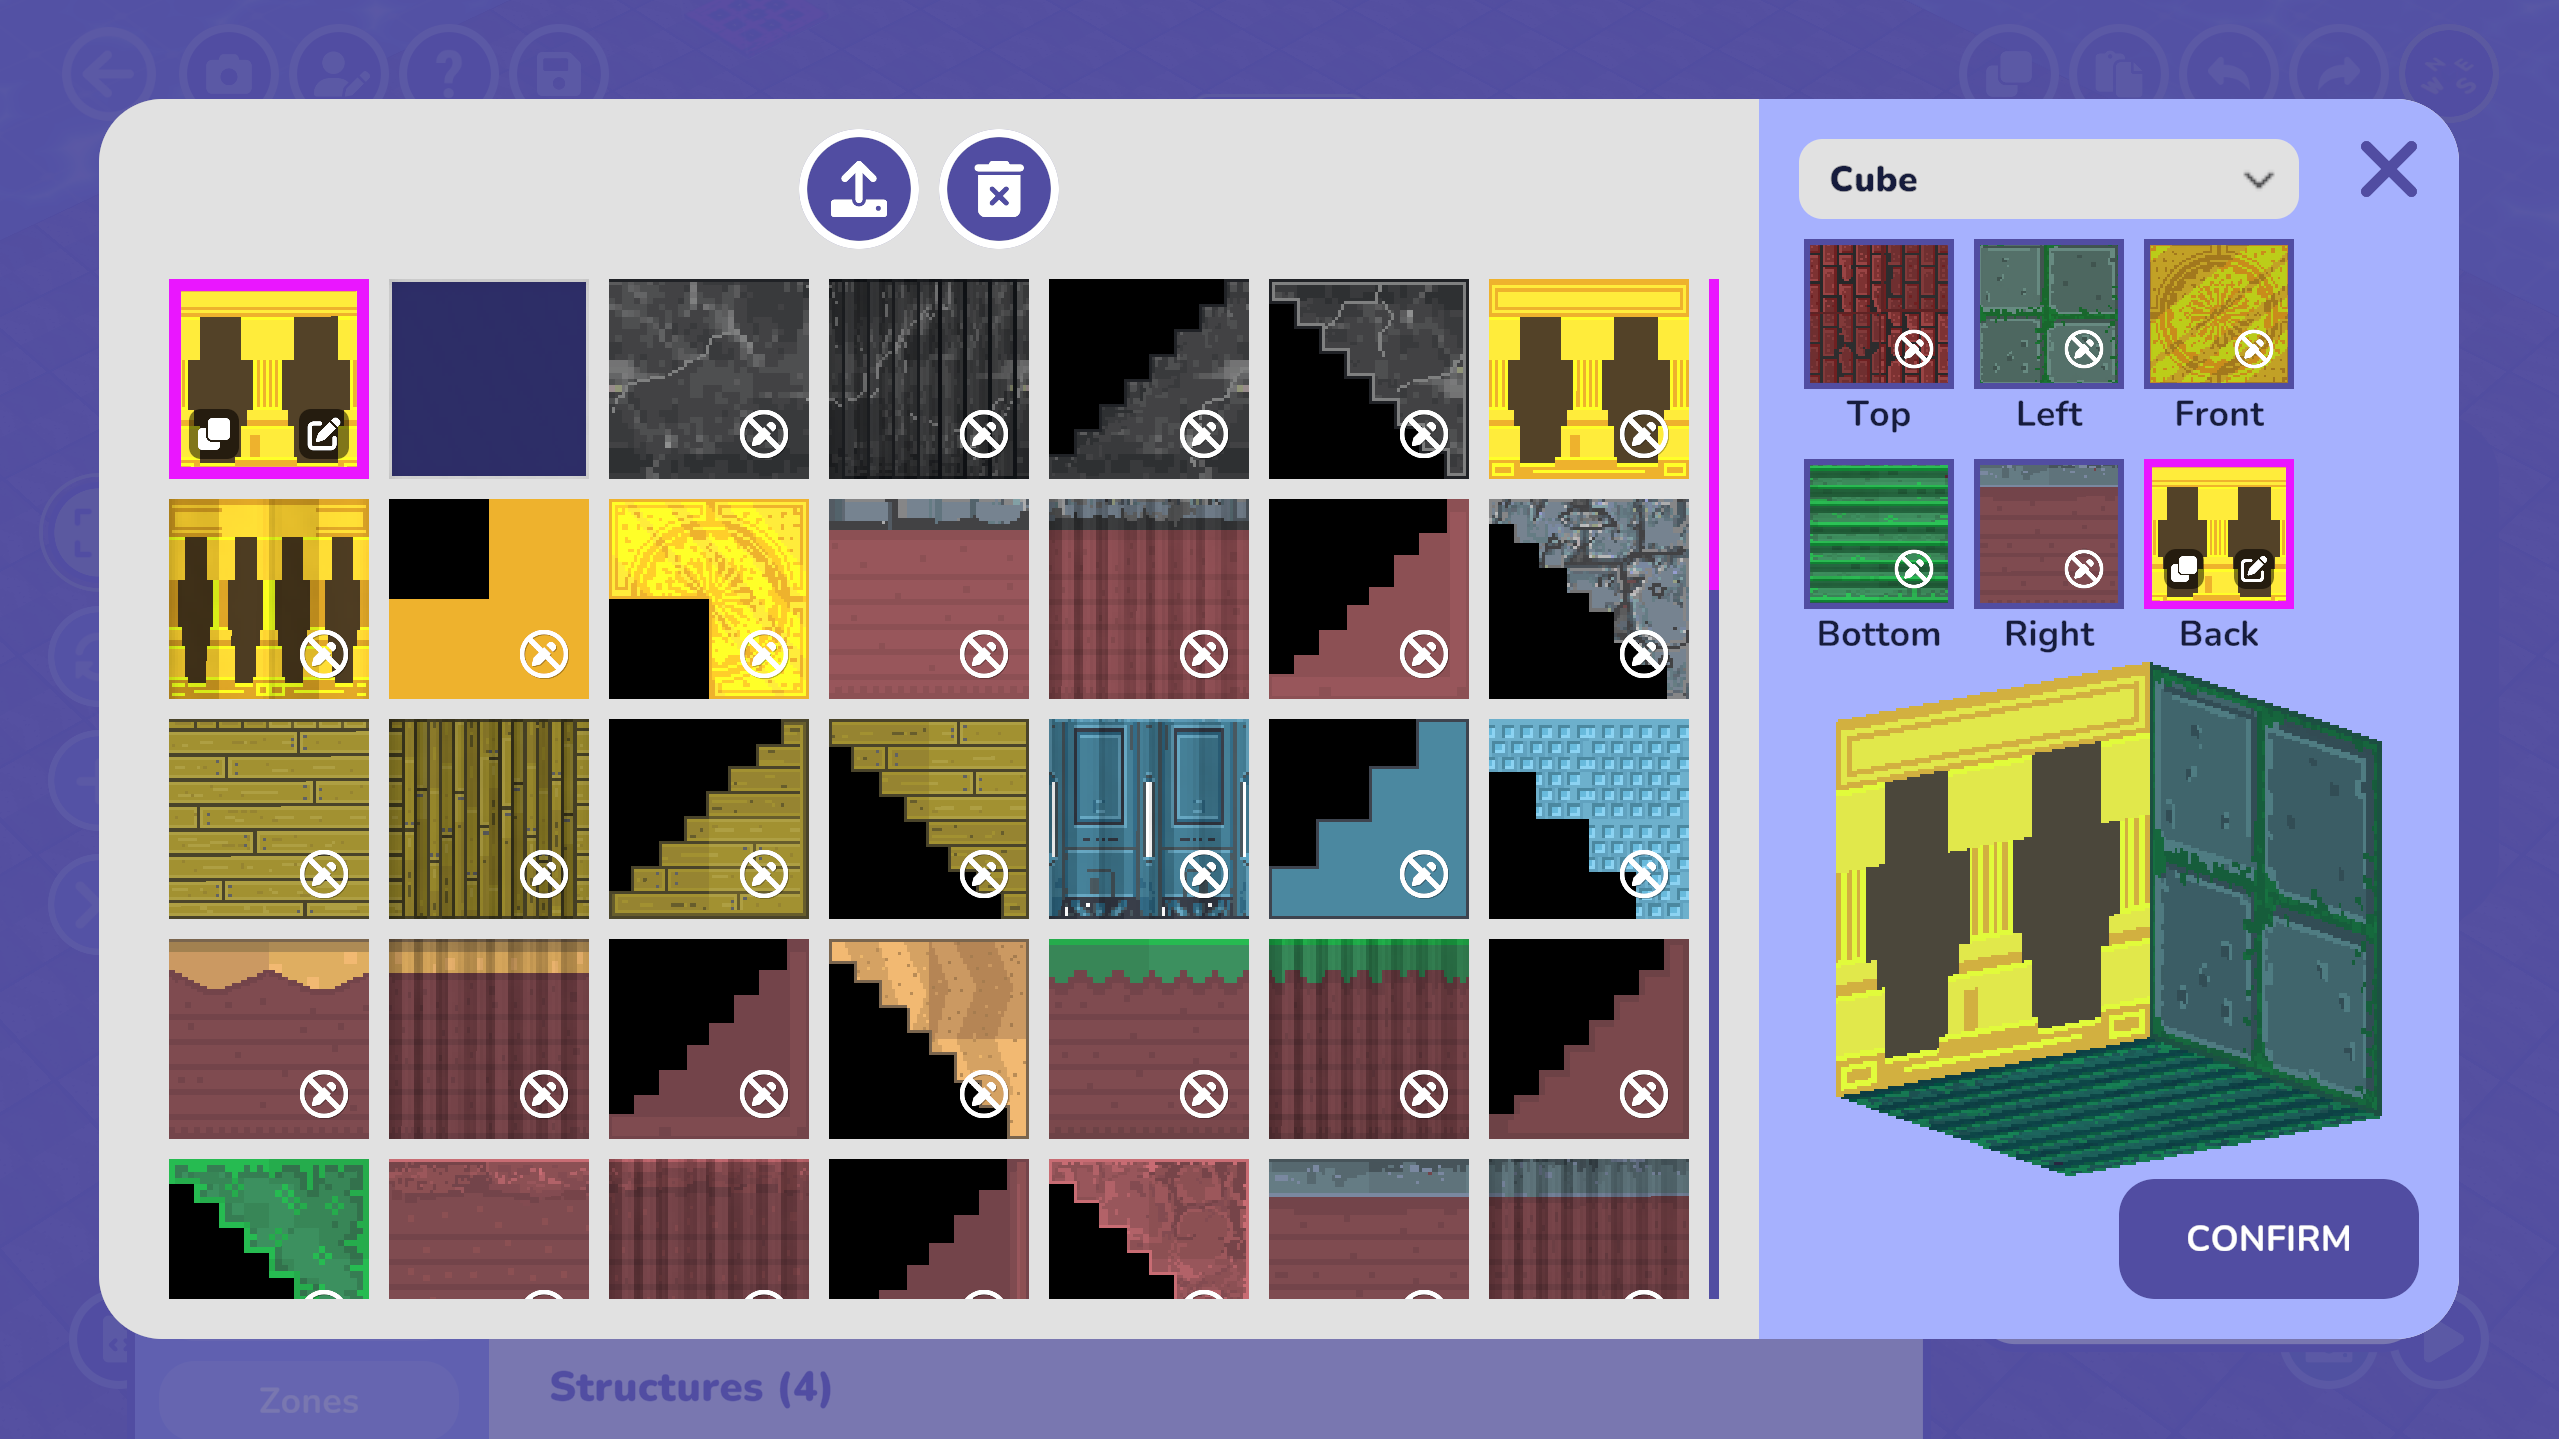
Let’s start with the right side. At the top is a dropdown menu where builders can select which type of land they want to make: block, chamfer, or ramp. You’ll notice that when switching between the three, the side list and rotatable 3-D projection below it change. Underneath, click a side to begin editing the texture on the selected side.
This is where the left side comes in. In the texture selection view, the left side is dedicated to the texture library, which includes both custom textures you made and textures from the stock land entities. Selecting a texture from the library will immediately replace the texture of the side you have selected. You'll also notice a couple of buttons you can press. At the very top, there are buttons to Upload and Delete textures.
Upload allows you to upload your own images from your computer into the game. Once it's uploaded, you can crop it and rotate it before turning it into a usable texture.
Delete removes the texture from the library. You can only delete your custom textures, not the stock textures.
If you select a texture, you'll also spot individual options to Clone and Edit each texture.
Clone is for making duplicates of a texture. For stock textures, cloning them is necessary if you want to make edits.
Edit opens up the paint view, which we'll be digging into in the next section. There, you can use the new drawing tools to customize the textures. You cannot edit the stock textures.
Now, the moment you've all been waiting for! To make your own texture, hit the Edit button to switch to Paint View.
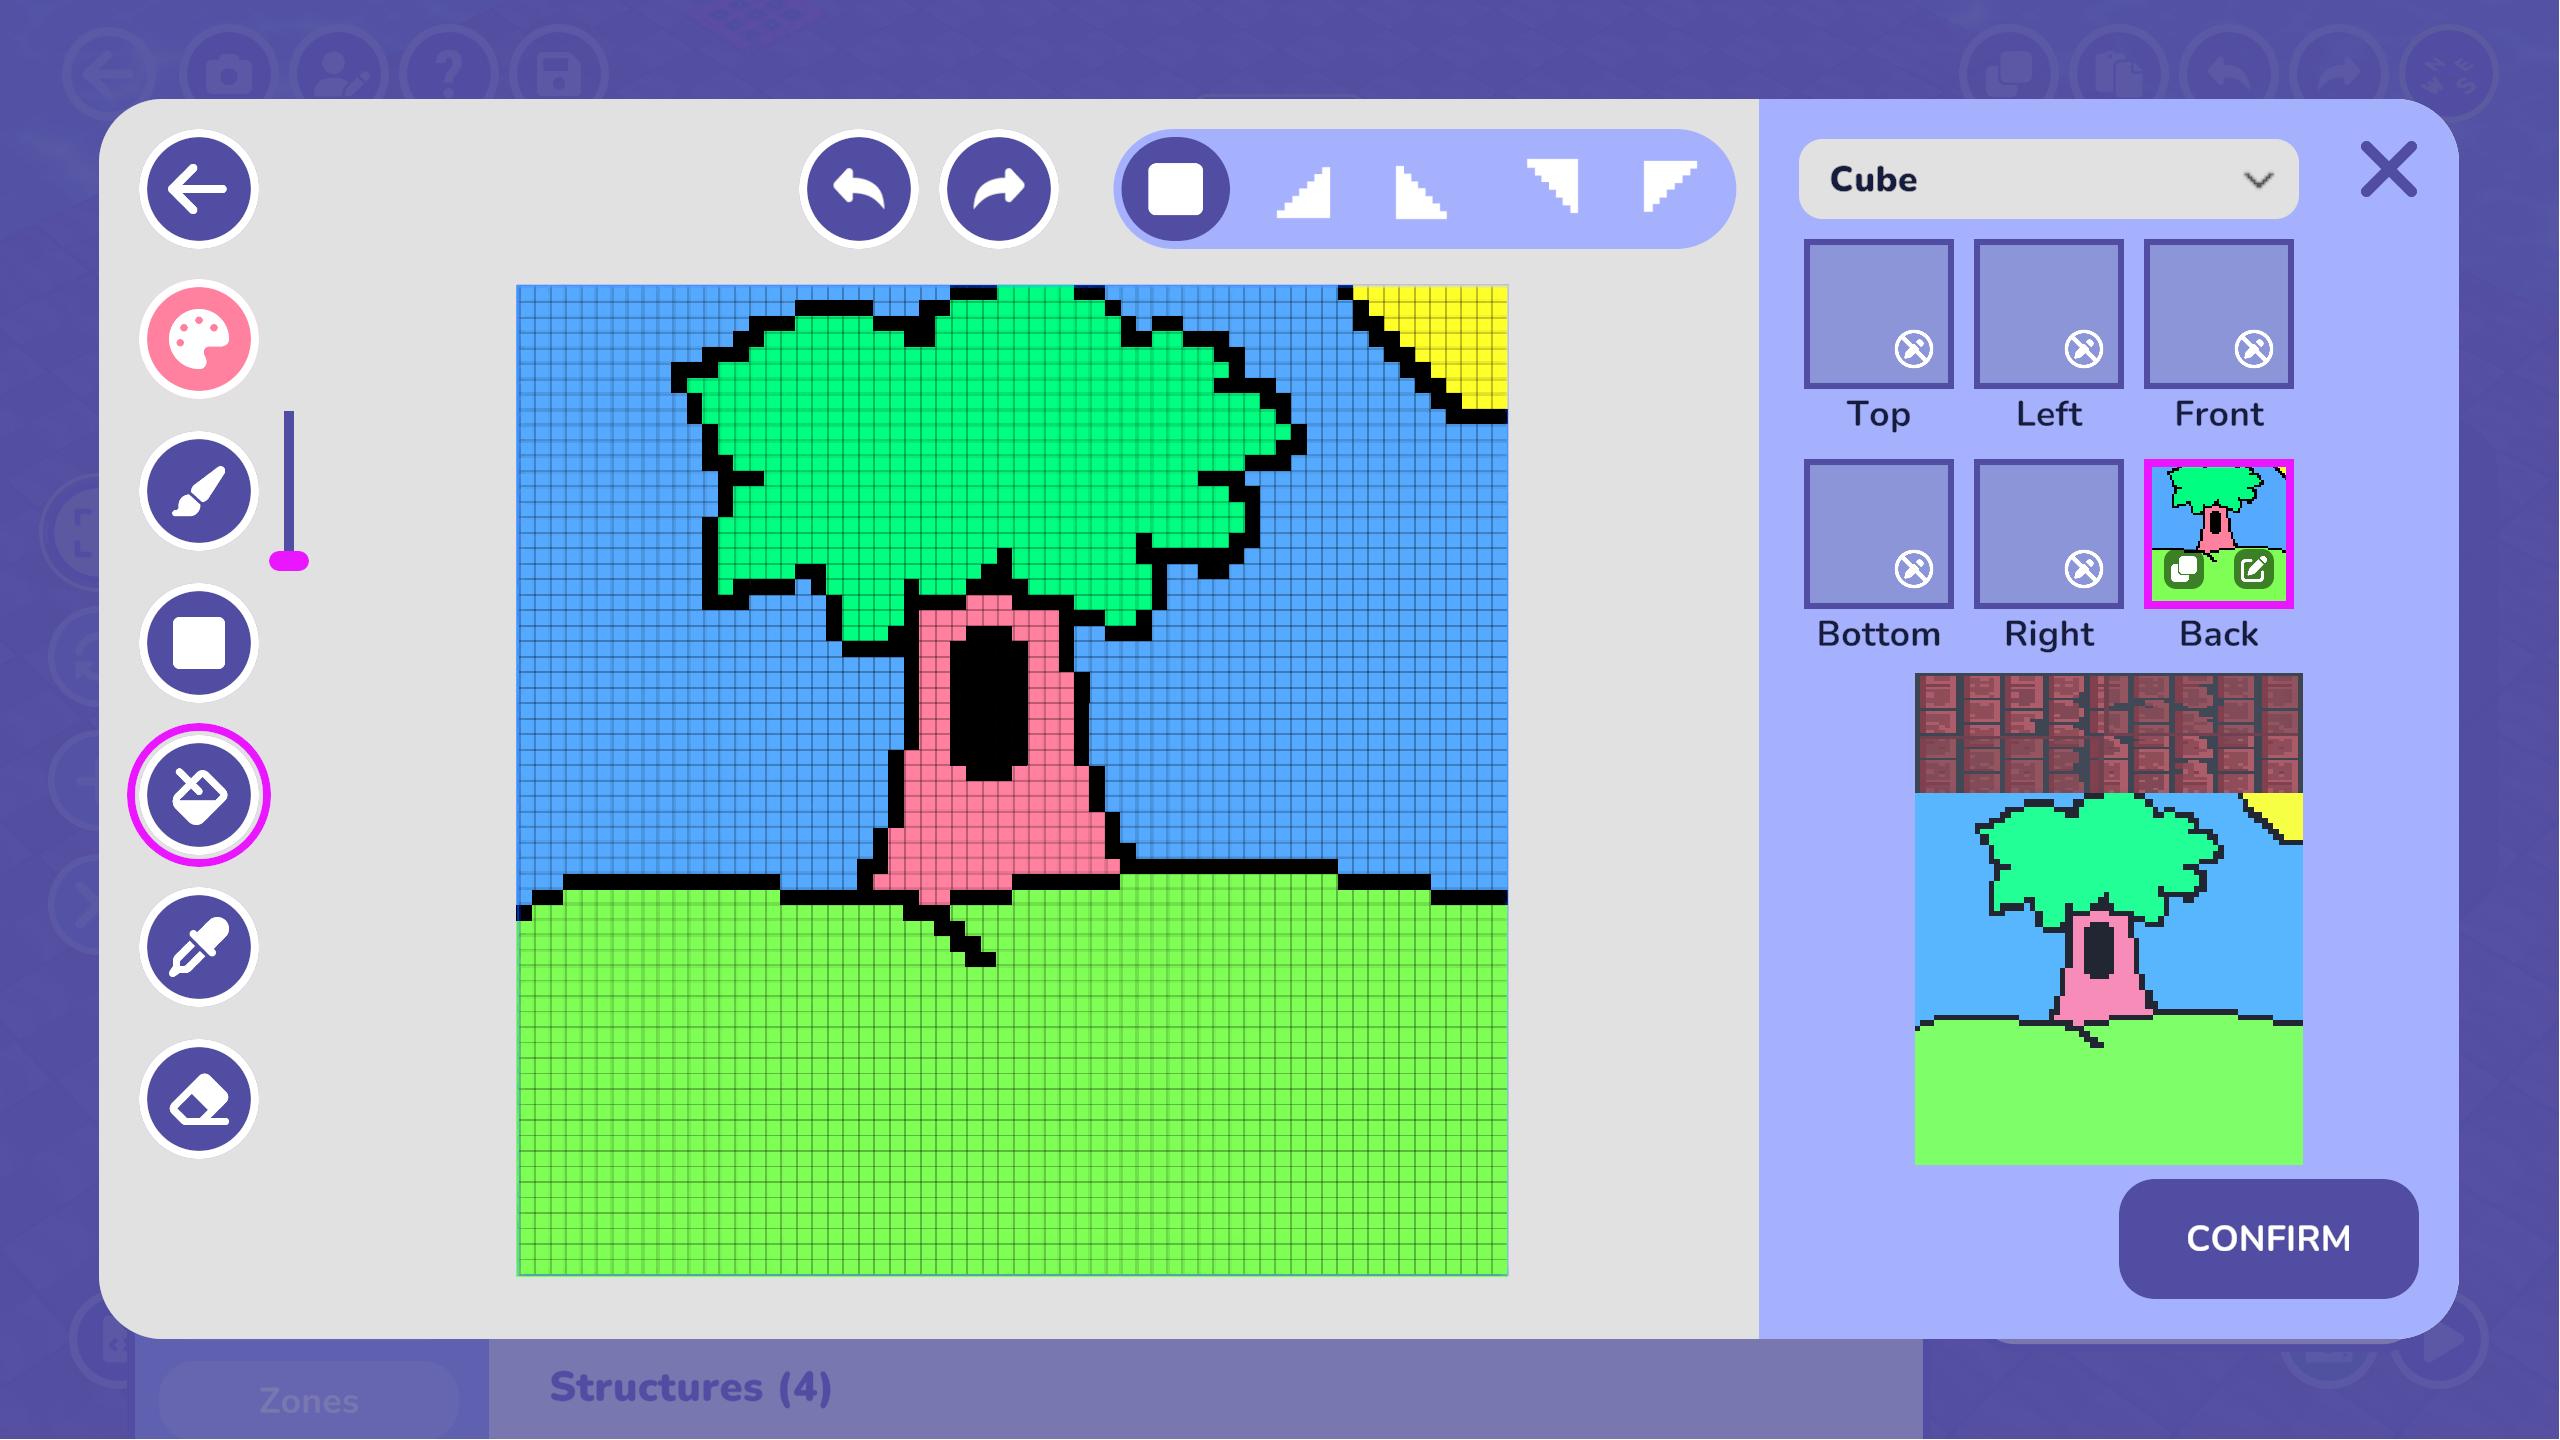
The left side will transform from the texture library to your new painter's studio. Paint view works like a simplified version of most drawing software you may know. You’ll notice that guidelines are available for the different shapes of sides, either the square or the triangles, as well as undo/redo buttons. Now let’s go through the tools.
The Color Picker is where you can select a color to use.
The Brush is your primary drawing tool. You can use the slider to adjust the brush size.
The Rectangle tool creates perfect rectangles with whatever dimensions you choose.
The Paint Bucket fills in any space with your selected color.
The Eyedropper copies the color from whichever part of the texture canvas you click on. This will overwrite the current color.
Finally, the Eraser, well, erases color. It's also affected by the same slider used for the pen.
Once you’re all done with your new masterpiece, hit the Confirm button to finalize your new texture and add it to your library. This also takes you back to the texture selection view. Assigned textures to all the sides on your new entity? Hit the Confirm button in this view and you're all done! The block will now be available to you in the inventory.
The editor is a chance to flex your art skills and express your creativity in a new way. Want a fancy, elaborate rug for your world? Draw your own multi-block rug! And for those not keen on drawing, even simple tweaks to textures can go a long way. The new editor is supported by a library of pre-existing textures players can use or modify. Why not slap an “X” on a sand block and hide some pirate treasure there? Creativity is king in SuperCode — we don’t want to miss out on any opportunities to be wowed.
With this big release out of the way, the team is back to improving existing building features to support the recent string of updates. And, of course, there’s still room for custom content across other facets of the experience and you can bet that we’re thinking about it. There's some interesting stuff in the works that we're sure you'll be surprised to see! Check out our Discord server to learn more.
We hope to see you there!